How to Build a House in Pakistan: Complete Step-by-Step Construction Guide 2026
Building a house in Pakistan is not one decision. It is a sequence of decisions involving land, design, approvals, structure, materials, contractors, budgets, inspections, finishes and final handover.
Getting the sequence right matters.
Many expensive construction problems begin long before the first brick is laid. A poorly verified plot, incomplete architectural drawings, an undefined construction scope, a vague contractor quotation or late design changes can create delays and cost overruns that become difficult to control once work has started.
Whether you are planning a 5 Marla, 7 Marla, 10 Marla or 1 Kanal house, the basic house construction process in Pakistan follows the same broad path:
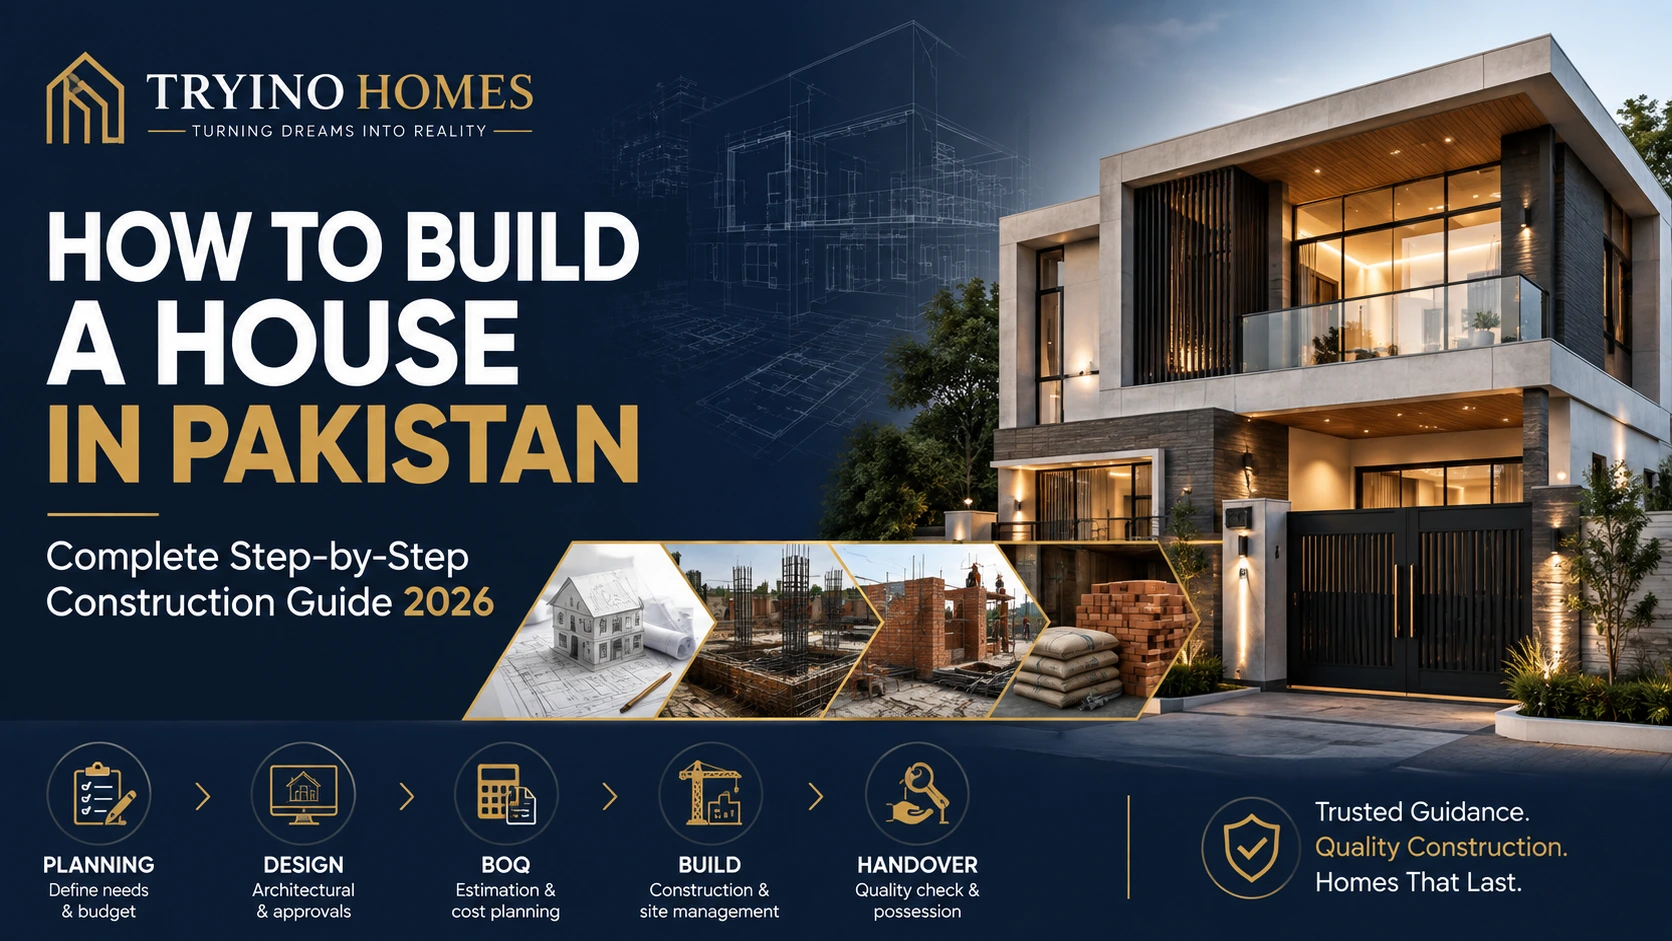
Plot Verification → Requirements → Budget → Architecture → Structural & MEP Design → Approvals → BOQ & Contract → Site Mobilisation → Foundation → Grey Structure → MEP → Waterproofing → Finishing → Testing → Handover
The details, however, vary according to your plot, soil conditions, housing society, structural design, construction scope and finishing level.
This guide explains the complete step-by-step house construction process in Pakistan, with particular relevance to homeowners building in Islamabad and Rawalpindi.
House Construction Process in Pakistan at a Glance
| Stage | Main Work |
|---|---|
| 1 | Verify plot, ownership and possession |
| 2 | Define family requirements and construction scope |
| 3 | Establish a realistic construction budget |
| 4 | Conduct site and soil assessment |
| 5 | Prepare architectural design |
| 6 | Complete structural and MEP drawings |
| 7 | Obtain applicable authority or society approvals |
| 8 | Prepare BOQ and material specifications |
| 9 | Select contractor and construction model |
| 10 | Mobilise site, demarcate and excavate |
| 11 | Construct foundations and plinth |
| 12 | Build the grey structure |
| 13 | Complete MEP rough-ins and waterproofing |
| 14 | Execute finishing and external works |
| 15 | Test, snag, document and hand over |
A professional construction process should also define who approves each stage, how payments are released, how material changes are handled and how progress is documented.
Step 1: Verify the Plot Before Designing the House
The first stage of building a house is not architecture.
It is confirming that the land you intend to build on is actually suitable and legally ready for construction.
Before hiring an architect or contractor, verify:
Ownership or transfer documents
Plot number
Plot dimensions
Physical location
Possession status
Society or authority status
Applicable building bylaws
Road access
Plot level
Utility availability
Outstanding dues
Applicable development charges
Mortgage or other restrictions where relevant
If you are still deciding between purchasing a file and an on-ground plot, read our guide to plot vs plot file in Pakistan before moving into construction planning.
Possession Is Particularly Important
A numbered plot is not necessarily a construction-ready plot.
A society may have assigned a plot number while:
Development is still underway
Roads are incomplete
Utilities are unavailable
Possession has not been formally offered
Construction permissions have not opened
If your goal is to build a house soon, ask:
Can construction legally and practically start on this exact plot?
That question is more useful than simply asking whether the plot is allocated.
Check the Plot Physically
Visit the actual location before finalising your design.
Look at:
Road width
Slope
Natural ground level
Adjacent plots
Existing neighbouring houses
Drainage
Access for construction vehicles
Street orientation
Sun direction
Views
Retaining-wall requirements
Significant level differences
A plot with unusual levels, weak soil, restricted access or major retaining requirements can change both the design and construction budget.
Step 2: Define What You Actually Want to Build
One of the most common construction mistakes is beginning architectural design before the family has agreed on its requirements.
Before drawings start, develop a written brief.
Define the House Size
Consider:
Plot size
Number of storeys
Desired covered area
Basement requirement
Rooftop use
Mumty
Servant area
Garage capacity
Remember:
Plot area and covered area are not the same thing.
A 10 Marla plot does not mean you will construct every square foot of the land. Setbacks, open areas, building bylaws and your floor-plan requirements determine the actual covered area.
Define Your Family Requirements
Think beyond the number of bedrooms.
Discuss:
Number of bedrooms
Attached bathrooms
Drawing room
Dining room
TV lounge
Powder room
Main kitchen
Dirty kitchen
Pantry
Laundry
Study/home office
Prayer area
Store
Servant room
Guest suite
Parents' bedroom
Family sitting area
Terrace
Lawn
Parking
Roof use
A family planning to live in the home for 20 years should also consider how its needs may change.
Future-Proofing Questions
Ask yourself:
Could elderly parents live with us later?
Do we need a ground-floor bedroom?
Might we install solar?
Will we need an EV charger?
Do we need a home office?
Should provision be made for a lift?
Could one floor eventually be used independently?
Do we want a separate rental portion?
Do we need extra electrical load for modern appliances?
Solving these questions on paper is much cheaper than solving them after concrete has been poured.
Step 3: Establish a Realistic House Construction Budget
The next step is understanding what you can realistically afford.
Do not start with:
“What is the construction rate per square foot?”
Start with:
“What is the total scope of my project?”
Construction cost is influenced by:
Covered area
Number of storeys
Basement
Soil and foundation design
Structural requirements
Grey/semi-finished/turnkey scope
Material brands
Finishing quality
Elevation complexity
Windows and glazing
Kitchens
Wardrobes
Sanitary fittings
Electrical fixtures
HVAC requirements
Solar
Smart-home systems
External works
Landscaping
Market conditions
Tryino Homes provides a live Construction Cost Calculator where homeowners can select plot size, storeys, location, construction scope and finishing level to generate a preliminary 2026 planning range.
The calculator is useful during early budgeting, but it is not a construction quotation. Final pricing still requires drawings, site conditions, specifications and a project-specific BOQ.
For deeper budgeting context, you can also read the 2026 House Construction Cost Guide.
Separate Your Budget Into Categories
A practical home-building budget may include:
1. Design and Professional Costs
Architecture
Structural design
MEP planning
Soil investigation
Survey/demarcation
Authority documentation
2. Grey Structure
Excavation
Foundation
RCC
Steel
Cement
Masonry
Roof slabs
Plaster
Basic MEP rough-ins
3. Finishing
Flooring
Tiles
Sanitary
Electrical accessories
Paint
Doors
Windows
Kitchen
Wardrobes
Ceilings
4. External Works
Boundary wall
Gates
Driveway
Landscaping
External drainage
Outdoor lighting
5. Optional Systems
Solar
Smart home
CCTV
Access control
HVAC upgrades
Water filtration
EV charging
6. Contingency
Unexpected conditions and approved design changes should not force the project into financial crisis.
Budget planning should therefore leave room for legitimate variations instead of allocating 100% of available funds to the initial contractor quote.
Step 4: Assess the Site and Soil
The foundation should respond to actual ground conditions rather than assumptions.
For some residential projects, particularly where soil conditions, slope, fill or structural load make it relevant, a geotechnical assessment may be required or recommended by the project engineer.
A soil investigation can help establish factors such as:
Soil composition
Bearing characteristics
Filled versus natural ground
Groundwater concerns
Foundation recommendations
The structural engineer can then design the foundation according to actual conditions.
Tryino's documented construction process places site/design assessment before structural execution so structural decisions are not made after work has already begun.
Why This Matters
Two houses with the same covered area do not necessarily require identical foundations.
One plot may have strong natural ground.
Another may contain deep fill.
A third may require retaining structures because of slope.
Using one generic foundation specification for every property is poor construction practice.
Step 5: Develop the Architectural Design
Architecture converts your requirements into a buildable home.
A strong residential design balances:
Function + aesthetics + privacy + ventilation + natural light + buildability + budget
Architectural Planning Usually Includes
Site plan
Floor plans
Room layouts
Staircase
Elevations
Sections
Doors and windows
Parking
Terraces
Roof planning
External appearance
More detailed packages may also include:
3D visualisation
Furniture layouts
Lighting concepts
Ceiling layouts
Interior concepts
Material palettes
Good Design Is Not Just a Beautiful Elevation
A house can look impressive from the street and still function badly.
Evaluate:
Circulation
Can people move easily between rooms?
Privacy
Can guests reach the drawing room without crossing private family areas?
Natural Light
Do major rooms receive sufficient daylight?
Ventilation
Are kitchens, bathrooms and living areas properly ventilated?
Furniture
Do bedroom dimensions actually accommodate beds, wardrobes and circulation?
Kitchen Workflow
Are cooking, washing, storage and appliance zones practical?
Parking
Can the planned vehicles enter, turn and park comfortably?
Staircase
Is it comfortable and correctly located?
Structure
Can the architectural concept be supported efficiently?
Every major layout decision should ideally be resolved before construction begins.
Step 6: Complete Structural and MEP Design
Architectural drawings tell you what the house looks like.
Structural drawings tell the contractor how it stands safely.
MEP drawings tell the construction team how the house functions.
Structural Design
Depending on the building, structural documentation can include:
Foundation layout
Footing details
Column layout
Beam layout
Slab reinforcement
Stair structure
Reinforcement details
Structural schedules
Structural decisions should be made by appropriately qualified professionals and coordinated with the architecture.
Never allow columns, beams or structural elements to be moved casually on site simply because they interfere with an architectural feature.
MEP Design
MEP means:
Mechanical, Electrical and Plumbing
Residential MEP planning can include:
Electrical
Distribution boards
Wiring routes
Lighting points
Socket locations
AC circuits
Kitchen appliance loads
Geyser points
UPS/inverter
Earthing
Solar preparation
CCTV
Internet/data
Smart-home conduits
EV charging provision
Plumbing
Fresh-water supply
Hot-water routing
Waste pipes
Sewerage
Floor drains
Rainwater drainage
Water tanks
Pumps
Mechanical
Depending on the project:
AC locations
Drainage
Ventilation
Exhaust systems
Ducting
HVAC provision
MEP coordination before construction greatly reduces the need to cut finished walls or slabs later.
Step 7: Obtain Required Building Approvals
Construction requirements vary according to location.
A house in a CDA-controlled area may follow a different submission process from a house inside:
DHA
Bahria Town
Bahria Enclave
Park View City
B-17
An RDA-regulated scheme
Another private housing society
For Islamabad projects under applicable CDA requirements, building-plan documentation can involve architectural and structural drawings, possession/title documentation and signatures from relevant approved professionals.
Rawalpindi also has its own RDA requirements depending on whether the property falls inside an RDA scheme, controlled area or approved private housing society.
Because regulations and procedures can change, always verify current requirements for your exact property before construction.
Do not assume that a drawing suitable for one society will automatically comply with another.
Step 8: Prepare a Detailed BOQ and Specifications
This is one of the most important steps in professional house construction.
BOQ stands for Bill of Quantities.
A BOQ helps define what work, materials, quantities and specifications are included in the construction package.
Without it, phrases such as:
“A+ construction”
“Premium material”
“Complete grey structure”
“Luxury finish”
“Turnkey house”
can mean different things to different people.
A Construction BOQ May Cover
Structural Materials
Cement
Steel
Concrete
Bricks/blocks
Sand
Crush
Plumbing
Pipe types
Pipe brands
Fittings
Drainage
Electrical
Cable specifications
Conduits
Distribution
Accessories
Finishing
Tile allowance
Sanitary allowance
Paint system
Doors
Windows
Kitchen
Wardrobes
Ceiling
Hardware
Use the Material Estimator Before Procurement Planning
If you are still at the early budgeting stage, Tryino Homes' Construction Material Estimator provides indicative planning quantities for materials such as:
Steel
Cement
Bricks
Sand
Crush
Concrete
You can adjust plot size, storeys, covered area and construction scope.
However, the Material Estimator should not replace an engineered BOQ.
Actual quantities depend on your structural drawings, architecture, soil conditions and project specifications.
Use it for planning.
Use the final drawings and BOQ for procurement and contracting.
Step 9: Choose the Right Construction Model
Not every homeowner needs the same type of contract.
The main approaches usually fall into several broad categories.
| Construction Model | Owner Involvement | Contractor Responsibility | Best For |
|---|---|---|---|
| Labour-only | High | Labour/execution | Experienced owners managing procurement |
| Grey structure | Medium | Structural shell | Owners planning finishes separately |
| Semi-finished | Medium | Structure + selected finishes | Owners wanting a middle ground |
| Turnkey | Lower | Defined build through finishes | Owners wanting one primary contractor |
Tryino Homes offers grey structure, semi-finished and turnkey construction across Islamabad and Rawalpindi. You can compare the scopes in detail in our Grey vs Semi-Finished vs Turnkey guide.
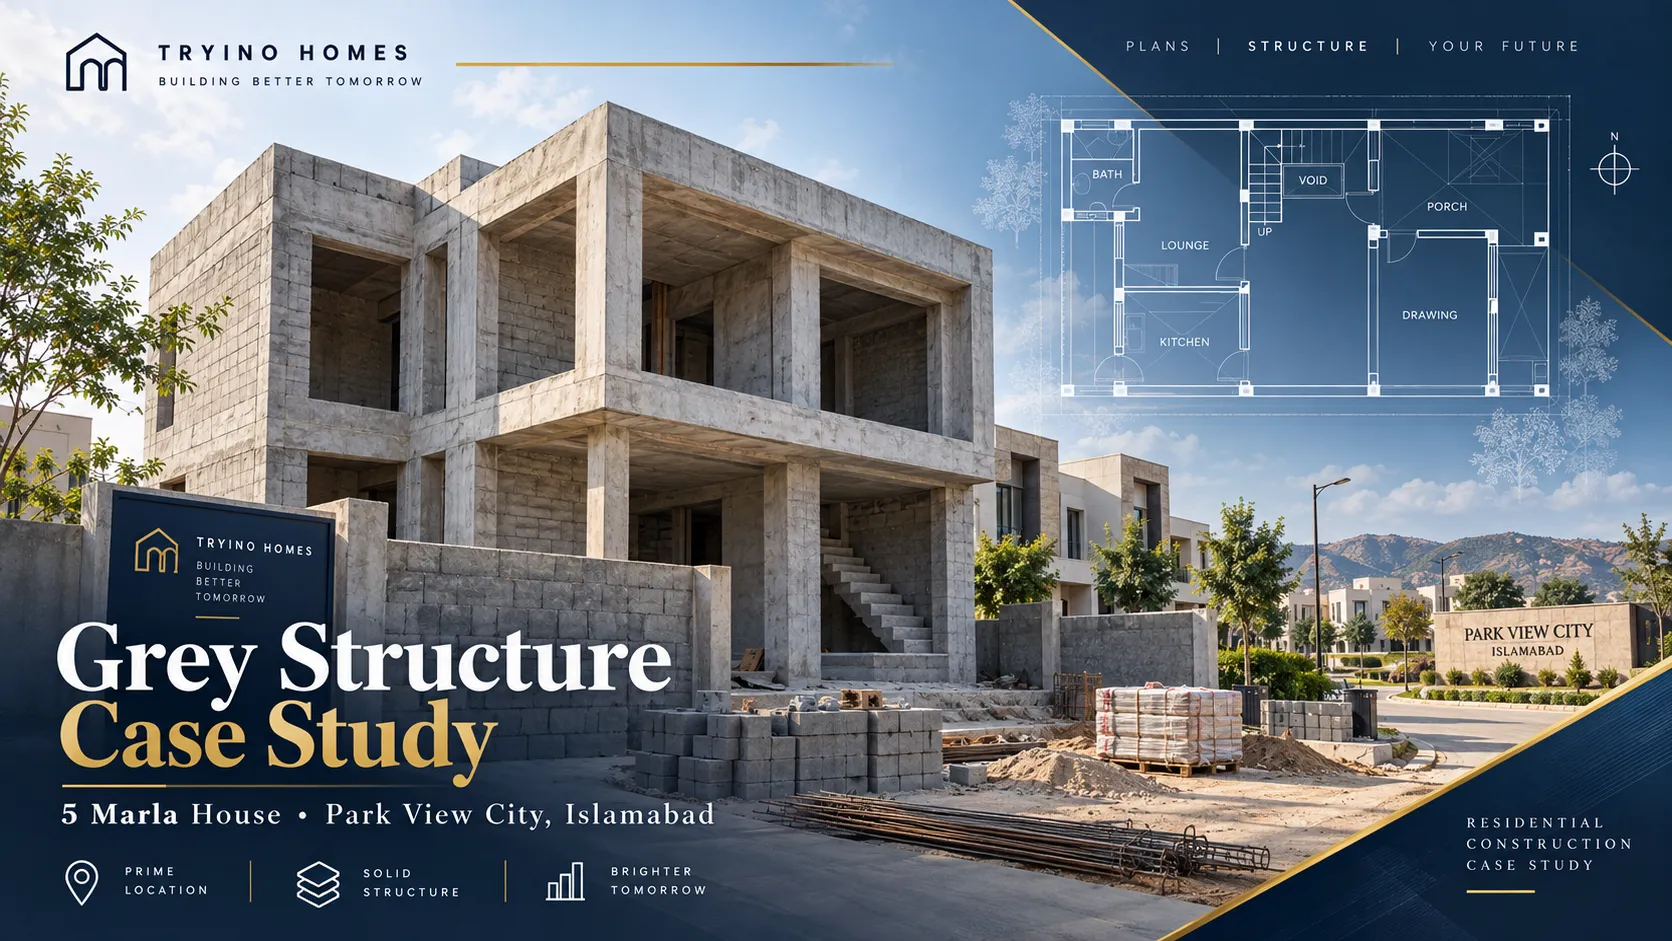
Grey Structure
Typically focuses on the structural shell and agreed basic rough-ins.
Pros
Lower initial scope
More control over future finishes
Suitable if finishing will be handled separately
Cons
Owner must coordinate later finishing
Multiple contractors can create responsibility gaps
Total completion cost is still unknown at grey stage
Semi-Finished
Sits between grey and complete turnkey.
Pros
Some major intermediate work completed
More flexibility over final selections
Cons
Scope varies widely between contractors
Requires particularly clear written specifications
Turnkey
Takes the project through defined finishing and handover.
Pros
One broader construction scope
Less owner coordination
Clearer path toward move-in
Cons
Higher contract value
Finish specifications must be extremely clear
Changes during construction can become expensive
The package name alone is never enough.
The signed scope and BOQ define the project.
Step 10: Select the Contractor Carefully
Never choose a construction company only because it provides the lowest per-square-foot rate.
Compare:
Real projects
Construction quality
Engineering supervision
BOQ detail
Material specifications
Reporting system
Payment structure
Contract clarity
Variation procedure
Snagging
Handover documentation
You can review actual Tryino Homes construction projects before comparing the company's work with other builders.
Questions to Ask Every Contractor
What exactly is included?
What is excluded?
Who supervises the site?
Who approves steel before concrete?
Which material brands/specifications are included?
How are changes priced?
How are payments linked to construction progress?
How often will I receive progress reports?
What happens if the project is delayed?
What is the snagging process?
What documents are provided at handover?
Tryino's Build Assurance framework explains how scope, materials, engineering supervision, milestones and progress reporting are documented across its construction projects.
Step 11: Site Mobilisation and Demarcation
Once drawings, contractual scope and relevant permissions are ready, physical site preparation can begin.
Typical early activities include:
Site possession
Boundary confirmation
Demarcation
Temporary electricity
Temporary water
Material storage
Labour arrangements
Site safety
Temporary fencing
Setting out
Demarcation
The approved house footprint should be transferred accurately from the drawings to the physical plot.
This establishes:
Building lines
Setbacks
Column positions
Reference levels
Excavation locations
Incorrect setting-out can affect the entire building.
Measurements should therefore be checked before excavation progresses.
Step 12: Excavation and Foundation
Now the visible construction process begins.
Excavation
Excavation is carried out according to:
Structural drawings
Foundation design
Site levels
Soil conditions
Excavation must be checked for:
Correct depth
Correct dimensions
Stable base conditions
Water problems
Unexpected filled soil
Foundation Construction
Depending on the structural design, this phase can involve:
PCC
Footing reinforcement
Raft or isolated footings
Foundation beams
RCC work
Column starters
Waterproofing where required
Foundation work is difficult and expensive to correct after the building rises.
That makes inspection before concrete especially important.
Step 13: Plinth, Backfilling and Damp Protection
After the foundation comes the transition to ground-floor level.
Work may include:
Foundation masonry
Plinth beams
Backfilling
Compaction
Anti-termite treatment where specified
Damp-proof course
Underground drainage
Sleeves/services
Ground-floor preparation
Compaction Matters
Poor backfilling and compaction can contribute to later settlement of floors and external areas.
Backfill should therefore be placed and compacted appropriately rather than simply dumping loose soil into foundation spaces.
Step 14: Build the Grey Structure
Grey structure creates the primary shell of the home.
Depending on the contract, it may include:
RCC columns
Beams
Roof slabs
Stair structure
Masonry
Parapets
Internal plaster
External plaster
Basic plumbing rough-ins
Electrical conduits
Sewerage lines
Because definitions differ, always refer to the BOQ for the actual scope.
Reinforced Concrete Work
Critical checks can include:
Reinforcement size
Reinforcement spacing
Laps
Anchorage
Concrete cover
Formwork
Column alignment
Beam dimensions
Slab thickness
Openings
Embedded services
These items should be checked before concrete is poured.
Once concrete has hardened, hidden reinforcement cannot be inspected visually.
Curing
Concrete and masonry require appropriate curing.
Poor curing can affect durability and quality.
Construction speed should never be achieved by skipping basic technical procedures.
Step 15: Masonry and Internal Space Formation
Walls transform the structural frame into recognisable rooms.
During masonry, verify:
Wall alignment
Door openings
Window openings
Room dimensions
Wall thickness
Lintels
Service openings
Verticality
This is also the point where architectural errors become very visible.
Walk through each room before plaster and ask:
Does this space actually work?
Changes are still possible—but the later they happen, the more expensive they become.
Step 16: Plumbing, Electrical and MEP Rough-Ins
A significant amount of a modern house disappears behind walls and floors.
These hidden services deserve as much attention as visible finishes.
Plumbing Checks
Consider:
Correct pipe specifications
Drainage slopes
Hot/cold lines
Bathroom locations
Kitchen lines
Water tank connections
Geyser points
Floor drains
Sewer connection
Inspection chambers
Electrical Checks
Review:
Switch positions
Sockets
Lighting
AC connections
Appliances
DB positions
Earthing
Internet
CCTV
Solar conduits
Smart-home conduits
Do a final room-by-room electrical review before plaster and finishing hide the conduits.
It is much easier to add a socket now than after marble, woodwork and paint are complete.
Step 17: Waterproofing
Waterproofing deserves its own construction stage.
Common high-risk locations include:
Roofs
Bathrooms
Balconies
Terraces
Water tanks
Basements
Planters
Other wet areas
Waterproof Before Finishing
Waterproofing should be:
Applied correctly
Allowed to cure where applicable
Tested
Rectified if necessary
Covered only after satisfactory checks
Discovering waterproofing failure after tiles, ceilings and paint are installed can turn a relatively simple correction into an expensive repair.
Step 18: Plaster, Screed and Surface Preparation
Before the attractive finishes arrive, the building needs properly prepared surfaces.
This phase can include:
Internal plaster
External plaster
Floor screeds
Ceiling preparation
Wall levelling
Corner finishing
Service patching
Check:
Wall verticality
Surface flatness
Floor levels
Bathroom slopes
Door/window interfaces
Good finishing depends heavily on the quality of work underneath it.
Step 19: Doors, Windows and Glazing
Windows affect much more than appearance.
They influence:
Natural light
Heat gain
Noise
Ventilation
Security
Energy performance
Depending on budget and design, homeowners may compare:
Aluminium
uPVC
Other engineered systems
Single glazing
Double glazing
Door decisions can include:
Main entrance
Internal doors
Bathroom doors
Terrace doors
Hardware
Locks
Specifications should be decided before procurement rather than selected at the last minute.
Step 20: Flooring and Tile Work
Flooring is one of the largest visible finish categories.
Options can include:
Porcelain tiles
Ceramic tiles
Marble
Granite
Engineered flooring
Other finishes
Before installation, check:
Levels
Slopes
Patterns
Tile layout
Joint widths
Skirting
Thresholds
In bathrooms and balconies, drainage slope matters more than visual appearance alone.
Step 21: Kitchen and Wardrobes
Kitchens require coordination between:
Plumbing
Electrical
Gas
Appliances
Cabinetry
Countertops
Lighting
Before fabrication, finalise:
Refrigerator position
Hob
Hood
Oven
Dishwasher
Microwave
Sink
Electrical sockets
Water filtration
Storage requirements
Wardrobes should also be coordinated with room dimensions, doors, AC positions and electrical points.
Step 22: Bathrooms and Sanitary Fittings
Bathroom finishing can include:
Tiles
WC
Basin
Shower
Mixers
Accessories
Vanity
Mirrors
Exhaust
Lighting
Before final handover, test:
Drainage
Water pressure
Hot/cold direction
Leaks
Flush systems
Floor drainage
Silicone/sealing
A visually expensive bathroom is not a good bathroom if water collects on the floor.
Step 23: Ceilings, Paint and Final Electrical Work
This phase begins to make the house feel complete.
Ceilings
Coordinate:
Lighting
AC grilles
Fans
Curtains
Access panels
Smoke/safety devices where applicable
Paint
A good paint finish depends on:
Dry walls
Proper surface preparation
Putty
Primer
Sanding
Correct coat system
Painting over damp or poorly prepared plaster rarely produces a long-lasting finish.
Electrical Accessories
Install and test:
Switches
Sockets
Lights
Fans
DBs
Breakers
External lights
Pumps
Step 24: External Works
Home construction does not end at the exterior wall.
External works may include:
Boundary walls
Main gate
Pedestrian gate
Driveway
Car porch
External paving
Landscaping
Lawn
Drainage
Outdoor lighting
Service areas
Roof services
These items are frequently under-budgeted.
Ask whether they are included in your construction contract or expected to be paid separately.
Step 25: Solar, Smart Home and Future Infrastructure
Modern homeowners should plan future technology before finishing, even if they do not install everything immediately.
Consider provisions for:
Solar
Roof space
Cable routes
Inverter location
Battery location
Earthing
CCTV
Camera points
Data cables
NVR location
Networking
Ethernet
Wi-Fi access points
Fibre/router location
Smart Home
Lighting controls
Sensors
Curtains
Security
EV Charging
If electric vehicles may be part of your future, electrical infrastructure can be planned during construction far more economically than retrofitted later.
Step 26: Construction Quality Checks at Major Milestones
Quality should not be inspected only when the house is complete.
Major inspection points can include:
Excavation
Foundation reinforcement
Columns
Beams
Slabs
Masonry
MEP rough-ins
Waterproofing
Plaster
Flooring
Finishing
Tryino Homes uses engineering supervision and documented construction stages within its Build Assurance approach.
The principle is simple:
Inspect work while it is still visible and correctable.
Step 27: Control Changes During Construction
Changes are normal.
Uncontrolled changes are expensive.
A client may decide to:
Move a wall
Increase a window
Change tile
Upgrade sanitary fixtures
Add solar
Change kitchen specifications
Add electrical points
Before the variation is executed, document:
What is changing
Why
Additional or reduced cost
Timeline impact
Who approved it
Avoid verbal variation management.
Six months later, neither the contractor nor client may remember exactly what was agreed.
Step 28: Link Payments to Construction Milestones
Avoid construction contracts where large payments are made without clearly defined corresponding work.
A better structure connects commercial stages with visible project progress.
Possible milestone categories include:
Mobilisation
Foundation
Ground-floor structure
Roof/slab stages
Masonry
MEP
Plaster
Finishing
Handover
Exact percentages depend on the individual contract.
Tryino's construction model uses milestone-based project planning, with commercial terms defined for the specific project. You can review the overall approach on the Construction & Development service page.
Step 29: Monitor Construction Progress
Even a good contractor should provide visibility.
A useful progress update may include:
Current stage
Work completed
Site photographs
Material deliveries
Open issues
Decisions required
Upcoming work
Milestone status
This becomes particularly valuable for clients who cannot visit the site every day.
Building a House in Pakistan While Living Overseas
For an overseas Pakistani, the biggest challenge is usually not choosing tiles from abroad.
It is maintaining visibility and decision control without being physically present.
A remote construction system should include:
Written BOQ
Material specifications
Named project contact
Milestone plan
Scheduled photo reports
Video calls where necessary
Written change approvals
Payment records
Material-selection approvals
Snagging documentation
Tryino Homes has a dedicated Overseas Pakistani house construction section explaining how overseas homeowners can coordinate construction in Islamabad and Rawalpindi using documented scope, engineering supervision and structured progress communication.
There is also a downloadable Overseas Pakistani Construction Toolkit covering documents, reporting expectations, contractor questions, milestone planning and handover preparation.
Do You Need a Relative in Pakistan?
Not necessarily.
A relative may help, but family presence should not substitute for:
Engineering supervision
Written documentation
Contractor accountability
Progress reporting
Financial records
Your construction process should be capable of standing on its own documentation.
Step 30: Snagging Before Handover
Never treat “construction completed” as the same thing as “ready for handover.”
Before accepting the house, prepare a snag list.
A snag is an incomplete, defective or unsatisfactory item requiring correction.
Snagging Checklist
Plumbing
Check all taps
Test showers
Flush toilets
Inspect under basins
Check drains
Test pumps
Look for leaks
Electrical
Test lights
Test switches
Test sockets
Check breakers
Test fans
Test outdoor electrical
Doors and Windows
Open and close
Test locks
Check alignment
Inspect seals
Check glass
Flooring
Inspect damaged tiles
Check joints
Check slopes
Check hollow areas where relevant
Paint
Check cracks
Check patches
Check coverage
Inspect corners
Kitchen and Wardrobes
Open drawers
Check hinges
Check alignment
Inspect countertops
Check plumbing
External Works
Gates
Drainage
Paving
Lighting
Roof
Boundary walls
Corrections should be completed before final sign-off according to the agreed contract.
Step 31: Final Testing and Documentation
At handover, collect the documentation relevant to your particular project.
This can include:
Approved drawings
As-built information where prepared
Completion documentation
Warranties
Product manuals
Material records
Keys
Access-control details
Final payment record
Snag closure record
Applicable authority completion requirements should also be followed.
The Tryino nine-step construction process extends through documented completion and handover rather than stopping when physical construction appears finished.
How Long Does It Take to Build a House in Pakistan?
There is no one timeline that applies to every house.
Duration depends on:
Plot size
Covered area
Basement
Design complexity
Structural system
Approval time
Construction scope
Labour
Weather
Material availability
Client decisions
Changes during construction
A simple grey-structure project is not comparable to a luxury turnkey home with bespoke joinery, imported finishes, HVAC and extensive external works.
Tryino's Construction Cost Calculator also provides an indicative duration based on the selected project configuration, which is more useful than applying one generic construction timeline to every home.
Typical Sequence
| Phase | Relative Position |
|---|---|
| Requirements & design | Before construction |
| Approvals | Before mobilisation |
| Foundation | Early construction |
| Structural frame | Major grey phase |
| Masonry & rough-ins | Mid construction |
| Plaster & waterproofing | Transition phase |
| Finishing | Major late phase |
| External works | Late phase |
| Testing & snagging | Final phase |
One of the most common causes of delay is not labour.
It is late owner decisions.
Material selections and approvals should therefore happen ahead of the stage where those items are needed.
How Much Material Does a House Need?
Material quantities depend primarily on:
Covered area
Structural design
Foundation
Storeys
Wall system
Beam/slab design
Architectural layout
That means there is no responsible universal statement such as:
“Every 10 Marla house needs exactly X tonnes of steel.”
For an early planning estimate, use Tryino's Material Estimator.
It provides configurable estimates for steel, cement, bricks, sand, crush and other planning quantities for various plot sizes.
Once architectural and structural drawings are completed, replace preliminary ratios with an engineered project BOQ.
Common House Construction Mistakes in Pakistan
1. Starting Construction Without Complete Drawings
Decisions then get made on site under pressure.
2. Choosing the Cheapest Contractor
A cheaper quotation may simply exclude more items.
3. No BOQ
Without written specifications, price comparisons become unreliable.
4. Frequent Layout Changes
Moving walls, plumbing and electrical systems after construction starts increases both cost and delay.
5. Ignoring Soil and Site Conditions
Foundations should respond to real conditions.
6. Poor MEP Coordination
This creates unnecessary cutting and rework.
7. Weak Waterproofing
Leaks often become visible only after expensive finishes have been installed.
8. Selecting Materials Too Late
Late procurement can delay work.
9. Paying Too Far Ahead
Commercial payments should correspond with agreed project milestones.
10. Relying on Verbal Agreements
Scope, variations and specifications should be written.
11. No Progress Reporting
Owners cannot manage what they cannot see.
12. Skipping Snagging
Minor defects become the owner's problem after handover.
House Construction Checklist Before You Start
Before mobilisation, try to have the following resolved:
Plot verified
Possession confirmed
Site inspected
Family brief finalised
Budget established
Architectural drawings approved
Structural drawings completed
MEP planning coordinated
Applicable permissions obtained
Construction scope selected
BOQ prepared
Material specifications documented
Contractor selected
Contract signed
Payment milestones defined
Variation process defined
Reporting process agreed
Construction schedule established
If several of these remain unresolved, starting excavation may be premature.
Why Documentation Matters More Than a Cheap Per-Square-Foot Rate
Homeowners often compare contractors using one number:
PKR per square foot.
But that number is only meaningful if the scope is identical.
Contractor A may include:
Higher steel specification
Better plumbing
Waterproofing
Material testing
Engineering supervision
Contractor B may exclude several of those items while quoting a lower rate.
Without a BOQ, both offers can look comparable even though they are not.
This is why Tryino Homes combines BOQ-defined scope, engineering supervision, material specifications, milestone planning and progress reporting within its construction model. You can see the framework in Tryino Build Assurance.
Building in Islamabad vs Rawalpindi
The core engineering process remains similar, but local requirements can differ.
For house construction in Islamabad, the applicable authority, sector or private society determines approvals and building controls.
Rawalpindi includes another mix of authority-controlled areas and private housing schemes.
Do not assume that:
Setbacks
Covered-area limits
Height restrictions
Approval documents
Fees
Submission procedures
are identical everywhere.
Your architect and construction team should verify the requirements applicable to your exact plot.
Planning Your Home? Use These Tools Before You Build
Tryino Homes has developed several planning resources for homeowners before they request a formal quotation.
Construction Cost Calculator
Use the Construction Cost Calculator to compare preliminary budgets by:
Plot size
Storeys
Location
Grey/semi/turnkey scope
Finish level
Material Estimator
Use the Material Estimator to estimate early-stage quantities for key construction materials.
Construction Cost Guide
Read the 2026 Construction Cost Guide to understand cost categories and why construction prices cannot be reduced to one permanent rate per square foot.
Scope Comparison
Compare Grey Structure vs Semi-Finished vs Turnkey Construction before deciding how much of the build you want one contractor to manage.
Overseas Construction
If you live outside Pakistan, review the Overseas Pakistani Construction Guide and Overseas Construction Toolkit before appointing someone to manage the project remotely.
Frequently Asked Questions
What Is the House Construction Process in Pakistan?
The process generally includes plot verification, requirements planning, budgeting, architectural design, structural and MEP drawings, approvals, BOQ preparation, contractor selection, site mobilisation, foundation, grey structure, services, waterproofing, finishing, testing, snagging and handover.
How Do I Start Building a House in Pakistan?
Start by confirming plot ownership, possession and construction eligibility. Then develop your requirements and budget before starting architectural and structural design.
Do not begin excavation before the drawings, applicable approvals and construction scope are sufficiently defined.
What Comes First When Building a House?
Plot verification and planning come before physical construction.
The first construction activities generally begin only after design, structural planning, approvals and contractual scope are resolved.
What Is Included in Grey Structure?
Grey structure typically includes the foundation, RCC structure, slabs, masonry and related structural work, plus certain rough-ins depending on the contract.
Because definitions vary, refer to the project's written BOQ rather than relying on the phrase “grey structure.”
What Is the Difference Between Grey Structure and Turnkey Construction?
Grey structure focuses mainly on the building shell, while turnkey construction continues through defined finishing and handover.
Read the full Grey vs Semi-Finished vs Turnkey comparison before selecting a scope.
What Is a BOQ in House Construction?
A BOQ, or Bill of Quantities, documents construction work, materials, quantities and specifications.
It helps homeowners compare quotations and makes project scope clearer.
How Much Does It Cost to Build a House in Pakistan?
There is no single permanent price.
Cost depends on covered area, structural design, storeys, site conditions, construction scope, finish quality and material prices.
For Islamabad and Rawalpindi planning, use Tryino's live Construction Cost Calculator.
How Much Steel and Cement Do I Need for a House?
The exact quantity should come from structural drawings and an engineered BOQ.
For preliminary planning, you can use the Tryino Material Estimator.
How Long Does It Take to Build a House?
It depends on size, scope, design, approvals, weather, procurement and client decisions.
A grey structure and full turnkey home should not be expected to have identical timelines.
Do I Need Structural Drawings?
Structural design is critical to determining foundations, columns, beams, slabs and reinforcement.
Relevant building-approval processes may also require structural documentation.
Should I Hire an Architect Before a Contractor?
Ideally, your requirements and architectural design should be sufficiently developed before construction pricing is locked.
Some design-and-build firms provide architecture and construction together, but the design should still be documented before execution.
Can I Build a House in Pakistan While Living Abroad?
Yes, provided the project is structured for remote management.
Use written scope, BOQ, milestone payments, engineering supervision, regular reporting and documented decisions.
Tryino has a dedicated Overseas Pakistani construction service for this purpose.
What Should I Check Before Final Handover?
Inspect plumbing, electrical systems, waterproofing, doors, windows, flooring, sanitary fittings, cabinetry, paint, exterior work and other contracted items.
Document defects in a snag list and close them according to the project agreement before final sign-off.
Ready to Build Your House in Islamabad or Rawalpindi?
The best time to control construction cost and quality is before work begins.
Start with:
A verified plot
A realistic budget
Complete drawings
A defined construction scope
A detailed BOQ
Engineering supervision
Written milestones
Regular progress reporting
If you are still budgeting, start with the Tryino Homes Construction Cost Calculator and Material Estimator.
If you already own a plot and are ready to move from planning into design and execution, explore Tryino Homes' House Construction Services for grey structure, semi-finished and turnkey construction across Islamabad and Rawalpindi.
And if you are building from another country, visit House Construction for Overseas Pakistanis to see how scope, milestones and progress communication can be structured for remote owners.
A successful home is not created by rushing to the first brick.
It begins with getting the decisions before that brick right.